A few weeks ago I contributed this fun little project to the blog Reasons to Skip the Housework. I thought it's such an easy and great last minute project for Easter I'd post it here as well.
Who's ready for Spring? I sure am. I'm hoping that by decorating for it, Spring will get the hint and stay a while. And these little chicks are the perfect fun and quick project to get started.
But first, let me introduce myself! My name is Missy and I blog at MissyDear. I've been blogging for about 5 years, but about a year ago I handed my first blog over to a friend that's taking great care of it so I could put all my focus on my family, the MissyDear blog, and my handmade shop. I blog all about the crafts I'm doing, the food I'm eating and the fun I'm having with my family. I'm so excited to be part of the Reasons to Skip the Housework and to get to know you all a little better!
So, let's get back to the adorable little pom pom chicks shall we? Have you ever made a pom pom? They are so quick and EASY! You may never buy them again.
All you need to get started is:
scissors
yarn
fork
thread (I used DMC floss so it would be a little bit stronger than sewing thread)
pipe cleaner
Now lets get started:
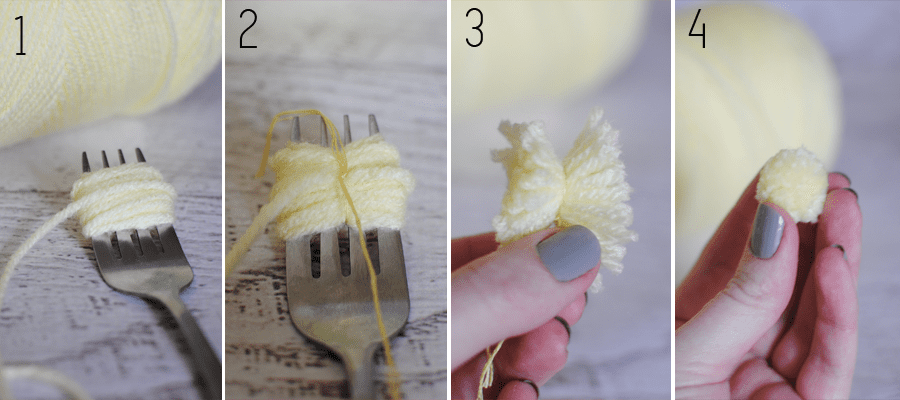
1 - Wind the yarn around the fork. The more you wind, the thicker and bigger your pom pom will be. For the chick you will want a small pom and a larger pom.
2 - Tie a piece of thread around the center of the yarn and pull it as tight as you can get it. The tighter you tie it, the less likely that pieces will fall out of the pom pom after it's finished.
3 - Now just pull the yarn off the fork and cut the loops all the way around.
4 - To finish it up you give it a little "hair cut." Trim all the way around until it's all even and as small as you'd like it. Also "fluff" it a little near the thread you tied it together with to try and diminish the line as much as possible.
Now lets move on to the assembling of the chick:
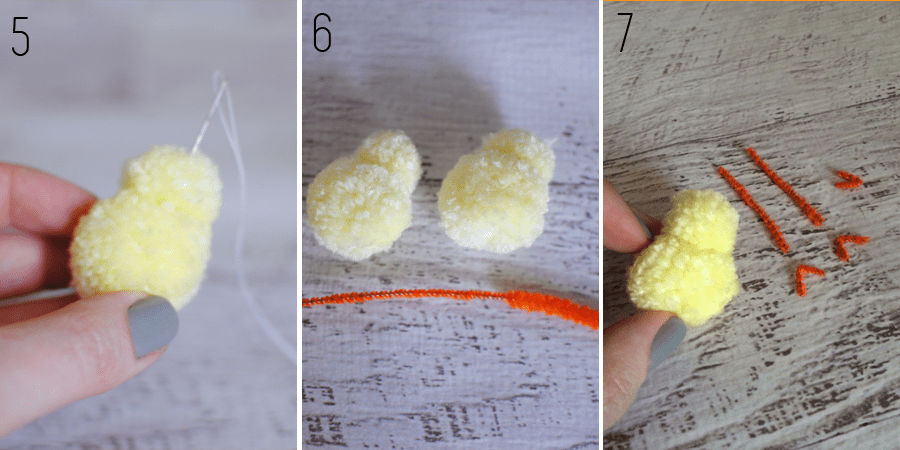
5 - Grab a large and a small pom pom. I sewed them together, but you could just glue them and save yourself time. Either way works just as well.
6 - Next I trimmed down my pipe cleaner so that the chicks little legs would be extra scrawny and cute. You can see in the picture the difference between where I trimmed and where I hadn't yet.
7 - Finally cut the pipe cleaner into two legs, two sets of toes, and one beak and glue them to the chick. I don't have a picture of the gluing, but you'r smart people and I'm sure you can figure it out :)
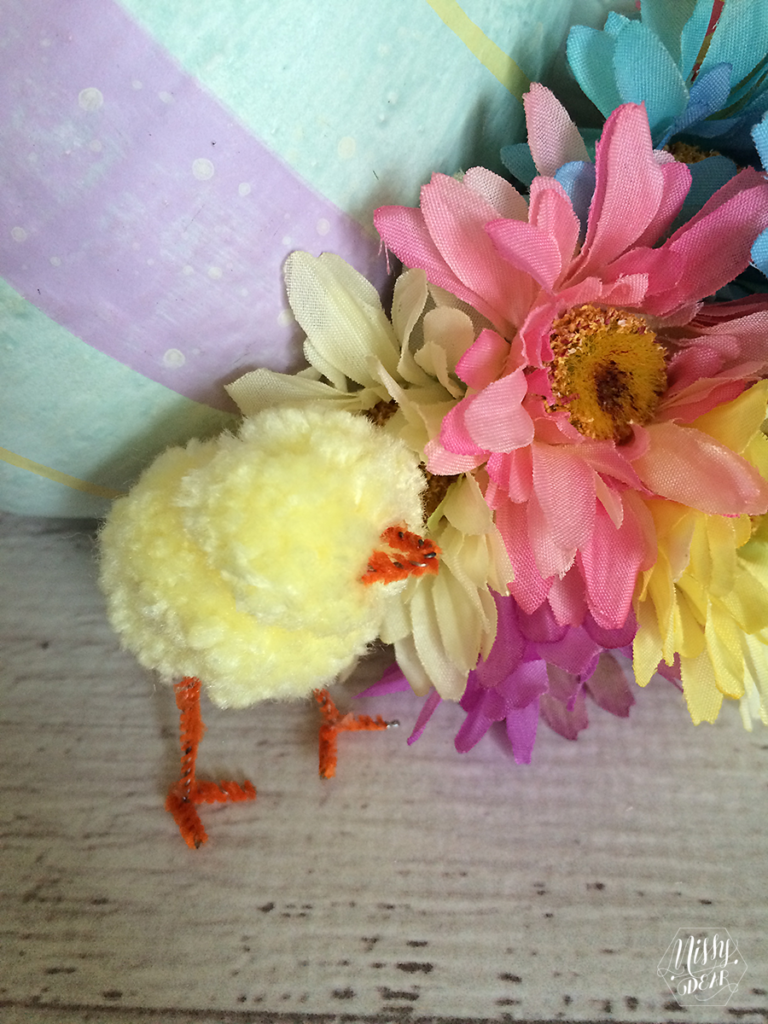
Viola!! You've now made yourself the most adorable and fluffy little chick. I'm sure it would look great in a center piece on your table.
Follow along on my blog or social media and make sure you tag me if you make yourself a little chick! I'd love to see it!!
Wednesday, April 16, 2014
Easter Pom Pom Chick Tutorial
Subscribe to:
Post Comments (Atom)
-
Missy
- I'm Missy. Mom + Handmade Maker.
BLOG ARCHIVES
Shop
POPULAR POSTS
-
My schedule has been so completely different now that I have a 3 month old and a 6 year old than it was with just the 6 year old. It normall...
-
So I have a pretty nice gig at my church . I get to work with the Activity Days Girls. They're all the girls in the congregation ages ...
-
My husband served a two year mission for our church in Brazil. His mom tells me he left hating (I mean really really disliking) beans and ...
-
A few months ago I was brainstorming what to do for this post. Finally, I thought of something and it was going to be fabulous! I was so e...
-
So I went camping last weekend with our awesome friends. My family was in charge of getting breakfast together, but the Hansen's wanted...
Labels
"love the place you live"
4th of July
Abi
abigail
accessories
adoption
all kids are artists
apothecary jars
art
baby
bags
BBQ
beauty
before amp; after
birthdays
blankets
blog contributor
Blog Events
blogging
books
Boston
bread
bunting
cards
carpet
chicken
chocolate
Christmas
comfort food
contributing
cookies
craft room
crafts
Create
crochet
crock pot
cross stitch
dad
DIY
Easter
easy gifts
Eat
Explore
explore MN
fabric
family
Family
family fun
family pictures
family visits
Fashion
Fashion Friday
favorite things
featured
felt
food
for kids
for me
Friends
fruit
furniture re-do
game nights
gift wrapping
Girls Room
giveaway
grilling
Guest Bloggers
hair
helpful tips
holidays
home
i'm topsy turvy
Inside
inside fun
Inspire
kids crafts
leather
life
lifestyle studios
little man
Live
lovelies via pinterest
Meals
meat
mom
movies
moving
My Fave Blogs
New Blog Finds
new finds
organization
Outside
outside adventures
outside fun
paint
painting
Paper
paper crafts
parenting
Party
party decor
pasta
photography
picked from the tree
pillows
pinterest
Pinterest Lovelies
play
Play
preschool projets
quilt
read
recipes
relax
review
reviews
RIT Dye
salads
Sew
sewing
Sewing for Me
sickies
side dishes
Sides
Snacks
spring
stamping
summer
Sweets
taco/fajitas
thirfty
time out
tips amp; tricks
travel
treats
tutorial
tutorials
Tutorials
TV
valentines day
vignettes
we r memory keepers
wear
winter
wreaths
zoo
Disclosure & Copyright
MissyDear may from time to time accept forms of cash advertising, sponsorship or other forms of compensation. Compensation received will not influence the editorial content. If I'm not honestly excited about a product, I won't write about it. Sponsored content or advertising space may not always be identified as paid or sponsored.
© 2013 by Missy Harding. You're more than welcome to link to this site or use an image and brief description to link back to any post. Republishing posts in their entirety is prohibited without permission. Thanks!


0 comments:
Post a Comment